Digital Signature With Cosign
Signing Software Artifacts using Cosign


Software Digital Signature
In this article, we explore signing artifacts such as containers, local files or OCI registry binaries etc., and we see how your artifacts can be signed in Github actions and Kubernetes.
Introduction
Cosign is one slice of the bigger umbrella Sigstore, an ecosystem under the openSSF community, aiming to improve software’s security supply chain. Its approach is pretty unique, simple yet powerful. In fact simplicity is one of the Sigstore fundamentals. It is designed with transparency in mind, that is, its been accepted very quickly by the community in a very short period of time i.e Kubernetes, Arch linux, Github. A few months ago it got its very first GA, and, with a stable API, now companies can consider it in production and benefit from Cosign.
What Problem Does It Solve?
Software widely consists of distributed artifacts, which are updated quite frequently. Companies and developers that build on top of these artifacts might expose their users to threats and vulnerabilities. This is where the digital signature comes into the picture. By definition, this is a scheme to help users verify the legitimacy of the downloaded software.
Two major topics when digitally signing software artifacts are integrity and authenticity, respectfully ensuring that signed data has not been altered and originates from the signer. While these are quite important, this does not guarantee the software delivered to the end user is still legitimate. We see why this is the case.
Digital Software Signature Scheme
A software digital signature’s scheme consists of the following mechanisms:
- Key creation : a way to generate public/private key pairs
- Sign : an algorithm to attach a signature to the software
- Verification : a way to verify the signature with help of the public key
Some commonly used schemes are ECDSA, RSA, and so on.
In the simplest way, a private key is used/generated by the owner (company or developer) to sign the artifacts and, hopefully, remains safe and secret!. On the other hand, a public key as the name implies is something publicly available(also generated by the owner).
There are three main challenges when using public/private key pairs to sign software artifacts:
- Distributions
- Storage
- Key Revocation
Storing private keys somewhere safe is a big challenge, even for big companies that are prone to make mistakes. When a private key is compromised, re-distributing a new key to the users is a big challenge.
Why Is Sigstore Different?
Instead of keys, Sigstore relies on identity. This is important because owner identity remains the same, regardless if its private key has been compromised. This immediately removes the necessity of public key discovery and distribution!
Sigstore has its own OIDC identity provider which is based on Dex and supports email-based OIDC providers Google, Github, and Microsoft.
Sigstore has a built in transparency logs service that records signed metadata to a ledger. Users can query the ledger and find useful information about the software they use. We explore this in detail in following sections.
How Does Cosign Work?
There are two ways to use the Cosign signing mechanism. The recommended approach is what is called keyless signing.
In a nutshell a short-lived certificate is generated and a transparency log is created in the Rekor server.
Here are the steps that Cosign take in details when you want to sign a new artifact:
Signing Artifact
- Step 1): Cosign sends the user into an OIDC login flow and, if authentication is successful, an OIDC ID token is returned.
- Step 2): Cosign generates a private key in memory.
- Step 3): Cosign sends a request to Fulcio, the Sigstore certificate authority, with the user’s public key and token_id from the previous step.
- Step 4): Fulcio returns a short-lived code signing certificate containing the user’s identity metadata (e.g. email) and public key to Cosign that is valid for 10 minutes.
- Step 5): Cosign signs the artifact and generates a signature.
- Step 6): Cosign adds a new record to Rekor, the Sigstore transparency log, with the signature and certificate from previous steps.
- Step 7): Rekor returns back a bundle timestamped and signed with its public key, which contains the user public key and signature to the Cosign. Note that when you sign an artifact like a container, this information is attached to the artifact by Cosign.
Verification Signature I mentioned that the certificate generated by Cosign is only valid for 10 minutes. You may be wondering how this very likely expired certificate can be used by the users to verify artifacts. The verification process is different from normal certification validation, for example TLS verification that you are likely more familiar with. What matters in the verification process is:
- Verify that Rekor signed the artifact with a specific timestamp for a specific identity.
- Verify that the signature is valid, using the artifact and the user’s public key.
The second option is the classic way, you can still use the private key to sign your software by providing it during the signing, and then use your public key to verify it. We will see these in action in next sections.
What Does Sigstore Sign?
A wide range of software artifacts, OCI compliant artifacts, Git tags, Blobs, Tekton bundles, WASM, and so on, for more details on this check the documentation.
Examples
- Signing container image
- Signing OCI binary file
- Signing local binary
- Github actions integration
- Github Integration
- Kubernetes integration
Signing a Container Image:
In this section we create a container, sign it, and then verify its signature by using Cosign.
To keep our example close to a real world scenario, we publish our signed container image into the github OCI registry. We also see how to sign container images using github actions.
In this demo we use docker to create the container, so make sure you have it installed.
To install cosign you can also follow the steps in official documentationbased on your environment.
Prerequisites
To publish our container into the Github container registry, we need to first authenticate against the Github Container registry. To do so you’ll need an access token. You can use a personal access token (classic) or in short PAT to do the authentication. Each access token has a scope that is a list of permissions that you’ll grant it. We need following permissions:
- read:packages
- write:packages
- delete:packages
To create personal access token follow Github documentation. When you generated one, save it in an environment variable:
| |
Go ahead and sign in to the Container registry by running the following command (USERNAME is your username in github):
It is important to note that the container registry service is at ghcr.io; we use this host later when we tag and publish our container.
Step1: Creating the container
Create a new directory called hello, and put our Dockerfile there. I use Ubuntu as my operating system so I will create this directory in the /tmp directory.
Now lets create the Dockerfile, it is fairly simple and enough for our demonstration. Go ahead and use your editor of choice! (I use vim)
| |
Copy and paste the following commands into the Dockerfile:
Step2: Building the container
To build the container in the same directory that Dockerfile exist, run following command:
| |
Step3: Tagging the container
Find the ID for the hello image that we just built by running following command in your terminal:
it is important to note how content is organized within the Github container registry. Content is stored in the ghcr.io/<NAMESPACE>/<ARTIFACT> format. NAMESPACE , in this situation, represents the name of a user account or GitHub organization. I am using my personal github user so command is like the following:
| |
Step3: Publishing the container
| |
When you publish a package for the first time, the default visibility is private. We don’t need to change the default for this demo.
Step4: Signing the container
Now that the container is in the Github container registry, we are ready to sign our very container, and then push that signature to the registry.
| |
You are asked to accept that you agree with having your information in the transparency log.
| |
Type y and you will be navigated to the OIDC workflow we mentioned earlier. Sign in to sigstore using you github account.

Since I am signing a private package I am asked by cosign again. It is fine and type y
Now we should be able to see that an SHA has been added to the tag.
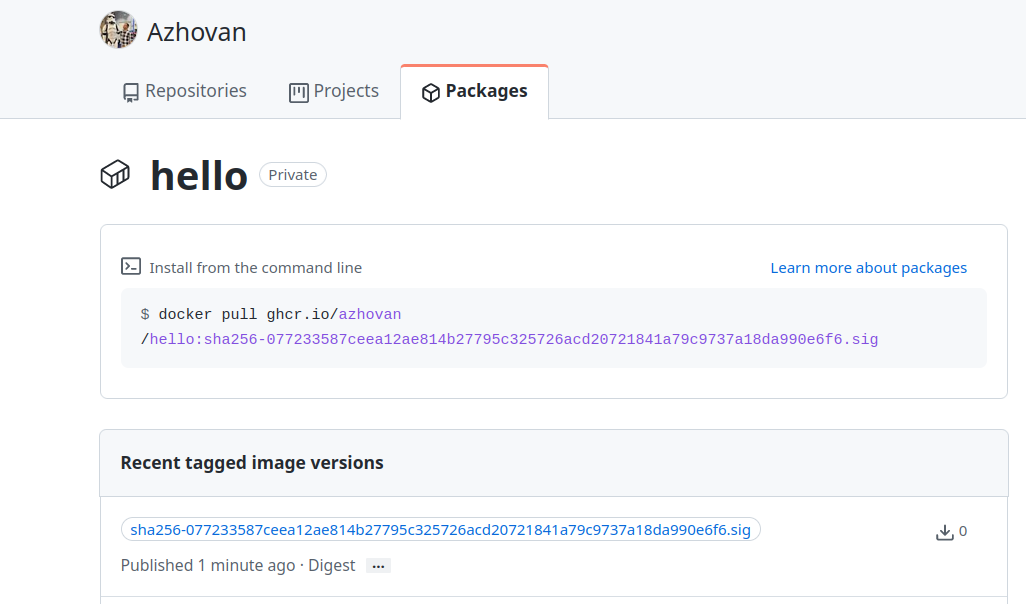
Step5: Verifying the container’s signature
At this step we can verify that our newly created container is signed by us. Also it is important to note that this approach can be applied to any signed container using the same steps.
Outputs include important information about the image digest, owner, OIDC issuer etc.
| |
Signing Binaries
You can sign and verify standard files and blobs in the OCI registry or local machine using Cosign. Signing a binary in a OCI registry is very similar to signing a container image.
Signing OCI Registry Binaries
Let’s create an example binary from a simple golang file:
Build the golang file:
| |
Upload the build file to GitHub container registry
Signing the file in OCI registry using keyless approach:
Signing Local Binaries
If you don’t have files in your OCI registry but instead have them on your local machine, you can no longer use keyless signing, but can use private/public key pairs.
| |
This generates cosign.key that is your private key and cosign.pub that is your public key.
Lets now, create a local file with custom content and sign it
follow the prompt and type y to sign the file.
| |
Notice that MEUCIEaTpRK/nsBLGvxg1aYy9hHp4CCHj2rnkUOY3wdPbe7fAiEAw2nZHX9b3kFu13L5fd3rvgk0cozHl5JpJ7+NpxbfylM= is the signature content that is required for verification.
To verifying the signature, use public key with the do as follows:
| |
Github Integrations
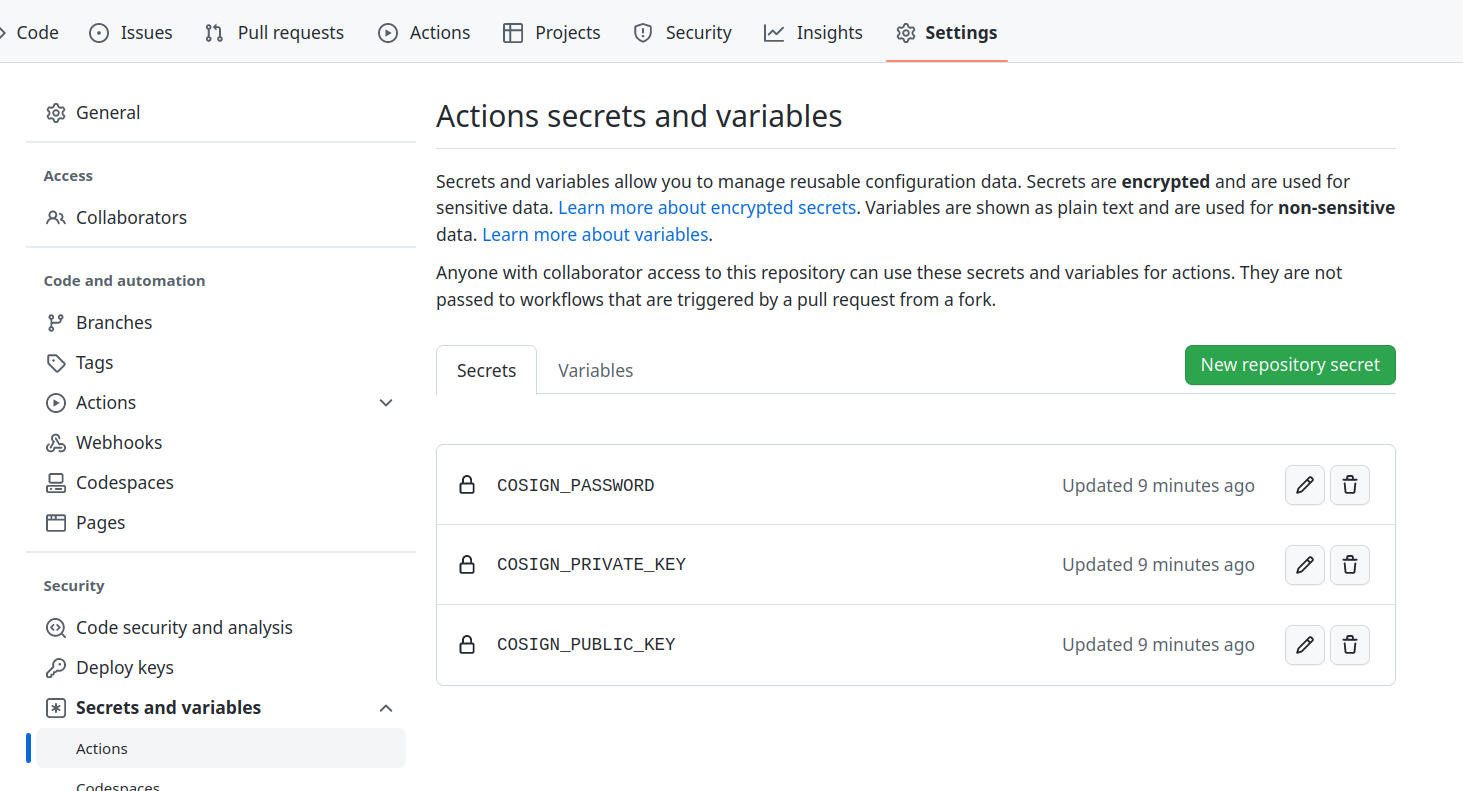
You can generate public/private key pairs and store them directly on GitHub actions’s secret. The benefit of this is to save these keys directly into your Github settings without being copied into your browser, terminal, or disk.
| |
This creates three action secrets COSIGN_PASSWORD, COSIGN_PRIVATE_KEY, COSIGN_PUBLIC_KEY
Github Actions Integration
Generate private/public key pair for your project and save them into your actions like what mentioned above in Github Integrations
| |
Create new workflow or add a new step to your existing one like the following:
| |
That’s it!
Kubernetes Integration
Cosign can use keys stored in Kubernetes Secrets to sign/verify signatures using following command:
| |
Generated key pairs are stored in the Kubernetes secret using your current context as follow:
| |